My Creations

Thursday, September 16, 2010

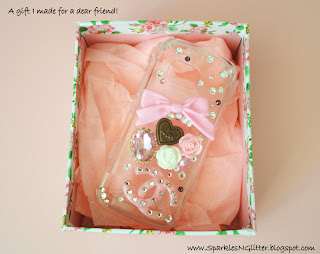
Deco cell phone case for a dear friend

Just wanted to who you the cell phone case I decorated for my dear friend for a birthday present

Wednesday, September 15, 2010

Paris Hilton's DIY line

I just found out that Paris Hilton has her DIY line selling cute scrapbooking supplies, iron-on transfers and decorative rhinestone stickies!  They offer free shipping within US & Canada if you purchase over $25. It's called the Creativity Collection and you can check it out at http://pariscreativity.com/.  I love the design of the website, so sparkly!

Sunday, September 12, 2010

New Pink Stuff!

Just wanted to show you the new pink things I got this weekend at Daiso in Richmond, BC.  It includes a pink cake themed tin box (where I'm storing some of my special thread in), and some super cute and pink stationary.  I absolutely love this store, you can find so many Japanese imported things there (from houseware to stationery to consumables).  Most things are priced at $2 only.   The store has 2 levels so you really can spend half a day there!

Friday, September 10, 2010

My Shop Featured!

My shop is featured here: http://dropdeadkawaii.blogspot.com/ .  Please have a look! ^___^

And now, for your viewing pleasure, here are some of my newest handmade items:

Wednesday, September 8, 2010

DIY Bulletin Board

 I made this easy-to-make bulletin board for my room (you may have noticed it in the picture below in my "Ribbon Spool Organizer" Tutorial).  The best thing is that you can customize it to your liking.  Bulletin boards don't always have to be brown and corked! ;) 

All you need is the following:
  • Canvas (any size you want; mine is 8"x10" and I got it from the dollar store for $2)
  • Heavy Duty Stapler (preferably a staple gun but my regular stapler did the job)
  • Fabric of your choice (about 3-4 inches wider and longer than the canvas)
  • Pretty Push Pins
  • Ribbon (optional)
To get started:
  1. Place right side of the fabric facing down on the desk. 
  2. Put the front side of the canvas on top of the fabric and fold fabric over to cover the sides and back of the canvas. 
  3. Staple the fabric down and repeat all the way around the canvas.
  4. Tuck excess fabric underneath the wooden part of the canvas.
  5. Add ribbon and push pins. 
Ta-Da!!  See how easy that was?? 


Monday, September 6, 2010

How to organize your ribbons - Ribbon Spool Organizer Tutorial

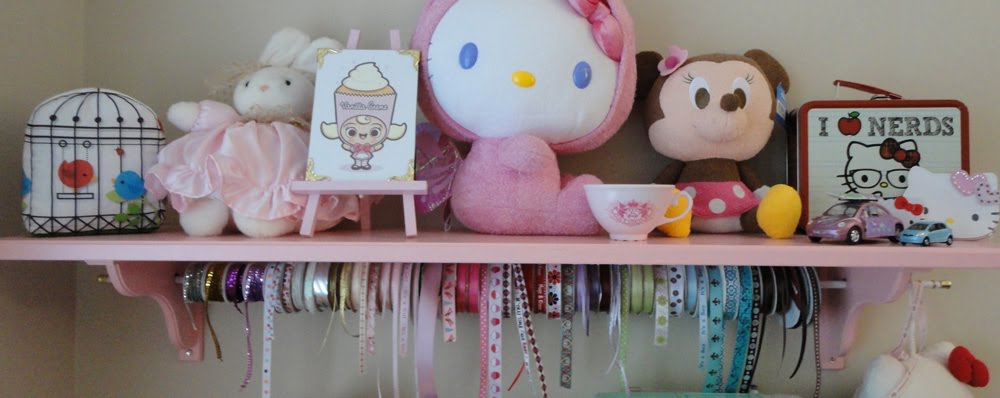
What you see here is a picture of my craft desk. This is where I create all my jewelries, iPhone cases, and cards. I painted the desk and shelf a pretty cotton candy pink.  I turned the shelf into a ribbon holder as well.  I used to store my ribbons in a shoe box but I like it this way a lot better.  It's much more easily accessible and does not take up as much space.

RIBBON HOLDER HOW TO:
All you need is the following: 
  • Wall shelf (I bought mine from IKEA and painted it with two layers of paint.  You can always find a good deal on Craigslist.  In fact, that's where I bought my desk which I painted pink).
  • Curtain pole (pick the skinniest one available at the hardware store - mine is about 1cm in diameter)
  •  Electric Drill
  •  Hammer & Nails 


Making it is easy!  All you need to do is to drill a hole to the side of both brackets (make sure the drilled hole is big enough for the pole to go through!), mount the shelf, and start putting your ribbon spools onto the curtain pole!! ^___^

Check out my store, I'm always posting new items!!
Sunday, August 29, 2010

Update!

It's time to update my blog!  I've been busy moving and settling in. I have my own craft room now so I have a lot more space to work with!   I'm all settled in now and have been posting lots of new items on my shop.  I'm also back to update this blog regularly!  

I want to share my latest collection of bling blings with you:

Here is my new deco'd Hello Kitty iPhone 4 case.  It took me awhile to deco it but it's worth it!  It's very sparkly as I used Swarovski crystals.  I will be selling deco'd Blackberry and iPhone cases in the near future.  Please keep checking back and keep an eye on my store at www.SparklesNGlitter.etsy.com! 


 Here is the light switch plate for my craft room.  This took me a longer time to deco as it requires gluing of individual crystals and filling in all gaps with tiny pearls and crystals..